Today's post is about a product I ran across on Pinterest.
I didn't like it when Pinterest started with the ads a few years ago but darn it if I don't find things I need through that feature from time to time. Clothes and shoes mostly.
But...I've had a situation at my house for quite awhile that I did not know what to do about till I happened upon a solution on Pinterest.
Last summer I bought a sweet pink climbing rose off Ebay.
Yes, I buy all kinds of stuff off Ebay including plants. I've bought hostas, lilies and this rose.
This rose was advertised as being native and hardy to my part of the country and I needed a rose that could survive the bright sun and heat that hits the front of my cottage in the summer.
Just looked up my past purchases on Ebay and this was an Antique Heirloom Seven Sisters Climbing Rose. I bought in June of 2017. Oh my two years ago!
It was just a little sprig of a thing. The first year, not much happened.
But this past spring I got some lovely blooms and it took off growing!
But as the summer progressed - this was the situation.
I knew I needed a trellis. But all the trellis's were made straight up and down.
I wanted it to curve and follow the arch of my front porch.
I debated making one of wire or copper pipe...which seemed involved and I didn't want a big trellis on the front of my house. I had seen hooks that you are suppose to drill into your house. But I did not want to drill holes into my brick. It's old and fragile.
So one day I'm on Pinterest and I see this ad for Magic Tape!
This stuff is suppose to hold up anything. And even works on a rough surface like brick.
It's double sided.
It will stick up very heavy things and when you are ready to take whatever down..it comes off without leaving a residue.
It's truly magic stuff.
Here's the link so you can watch the video if you have not seen it.
I bought from the site LifeBooster. I was skeptical and worried it wouldn't come but in two weeks it appeared in my mailbox.
I ordered the smallest amount. It was $14.99.
I bought command hooks at Walmart.
I bought these because they are clear.
I bought these because they are clear.
I cut small pieces of the tape and stuck it into the grout of my brick. I had done a test the day before on the back of my house to see if it would work and it did...stayed all day and came off very easily when I pulled it off.
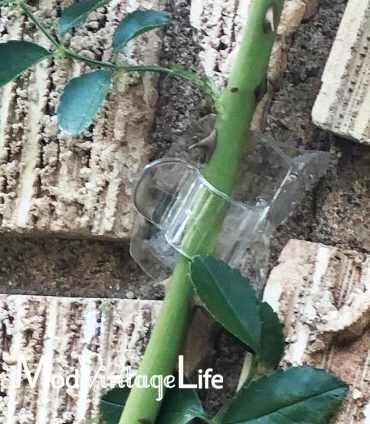
I stuck up several hooks with the stuff and pushed the vine into the hooks. I had contemplated tying the stalk to the hooks with twine but decided to push inside. I may regret and be taking them out and tying next year because if the vines get large they will burst out of the hooks.
Any gardeners have an opinion on this?
There you see it close up.
So this has been up over a week now and it's doing great.
Still stuck very tight.
I guess as more branches grow - I'll add more hooks.
I guess...I don't really know how this is going to go.
It's an experiment.
I guess...I don't really know how this is going to go.
It's an experiment.
One day the front of my house will look like this!
This magic tape is amazing. I fixed this little problem too.
I bought this mailbox a year or so ago because the weenies kept eating my mail.
I have a mail slot and it drops to the floor and the dogs run in there and get my mail before I do and scatter it around the house. This has been a problem since I moved in. But one day I was browsing Hobby Lobby and found this antique looking mailbox that was just the right color to blend with my historic house plaque on my porch.
This was the solution to keep the weenies out of my mail.
This was the solution to keep the weenies out of my mail.
I drilled holes into the brick and used anchors to hang it but there was no way to keep the bottom of the mailbox attached to the house. This really became a problem say if I got a magazine or a bunch of mail - the postman would cram it in there and I'd come home finding my mail box about to fall off the wall. Sometimes dangling. It just wasn't stable. It needed to be attached to the wall at the bottom as well. I tried several sticky things and nothing stuck to the brick.
But after I made my trellis, I cut a bit of the magic tape and stuck to the bottom on the back
and ta-da!!!!
Now my mailbox is very secure. It doesn't move around at all any more.
I have no idea what else I'll use this magic tape for but I bet I come up with some other uses.
A few photos of the porch as summer is winding down.
It will be super hot here for at least another 4 weeks. So it will be awhile before fall goes out on the porch. I keep twinkle lights in the lanterns on my front porch year round.
I love that nest pillow.
I bought from my sponsor over on the right margin of this blog -
I bought from my sponsor over on the right margin of this blog -
shop here
This was the first pillow bought from her.
But I have several that I change with the season.
I'm sure many of you are familiar with her designs. So lovely.
But I have several that I change with the season.
I'm sure many of you are familiar with her designs. So lovely.
They are always beautifully made.
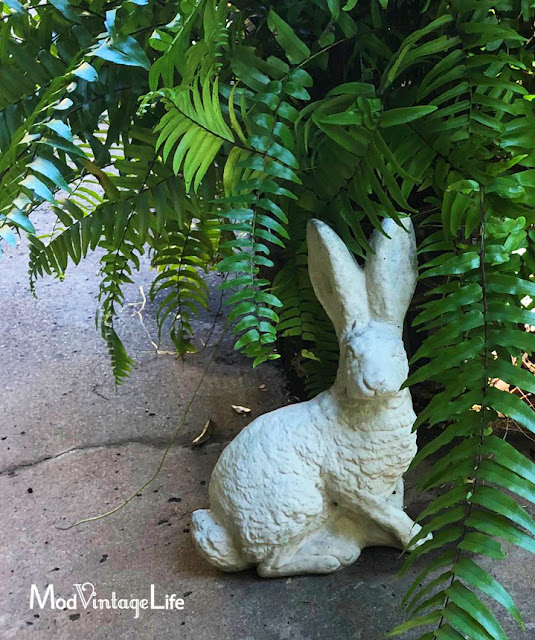
A few cement rabbits tucked here and there.
My impatiens are doing really well now.
I didn't have much of a budget for flowers this year.
I didn't have much of a budget for flowers this year.
I bought one group of six impatiens for $1.98 in the spring.
With that one group of six tiny plantings...I've filled four big pots full.
Actually, when I buy impatiens I look for gangly ones...
ones that have gotten long because I
ones that have gotten long because I
nip them off and stick the part I nipped off into damp soil in a pot and keep it damp for a week.
At the end of the week...those little cuttings have started growing in the new pot and the old ones are better for being groomed. I do it over and over during the summer till I have lots of impatiens around here.
linking up to this party
linking up to this party


.png)


.jpg)


.JPG)


